Using labels to group similar items
Related Video: Label Management
Label Management lets a device administrator organize users and devices by tagging them with manual and smart labels that can quickly be referenced using filters.
Manual labels are helpful when classifying, organizing, and searching for devices. Smart labels allow you to create and save filters that identify devices and users by their attributes. Once created, all label types can be managed from the Labels Library.
Create manual labels
A manual label can be created while working with a device, a user, or in the Labels Library.
To create a new manual label:
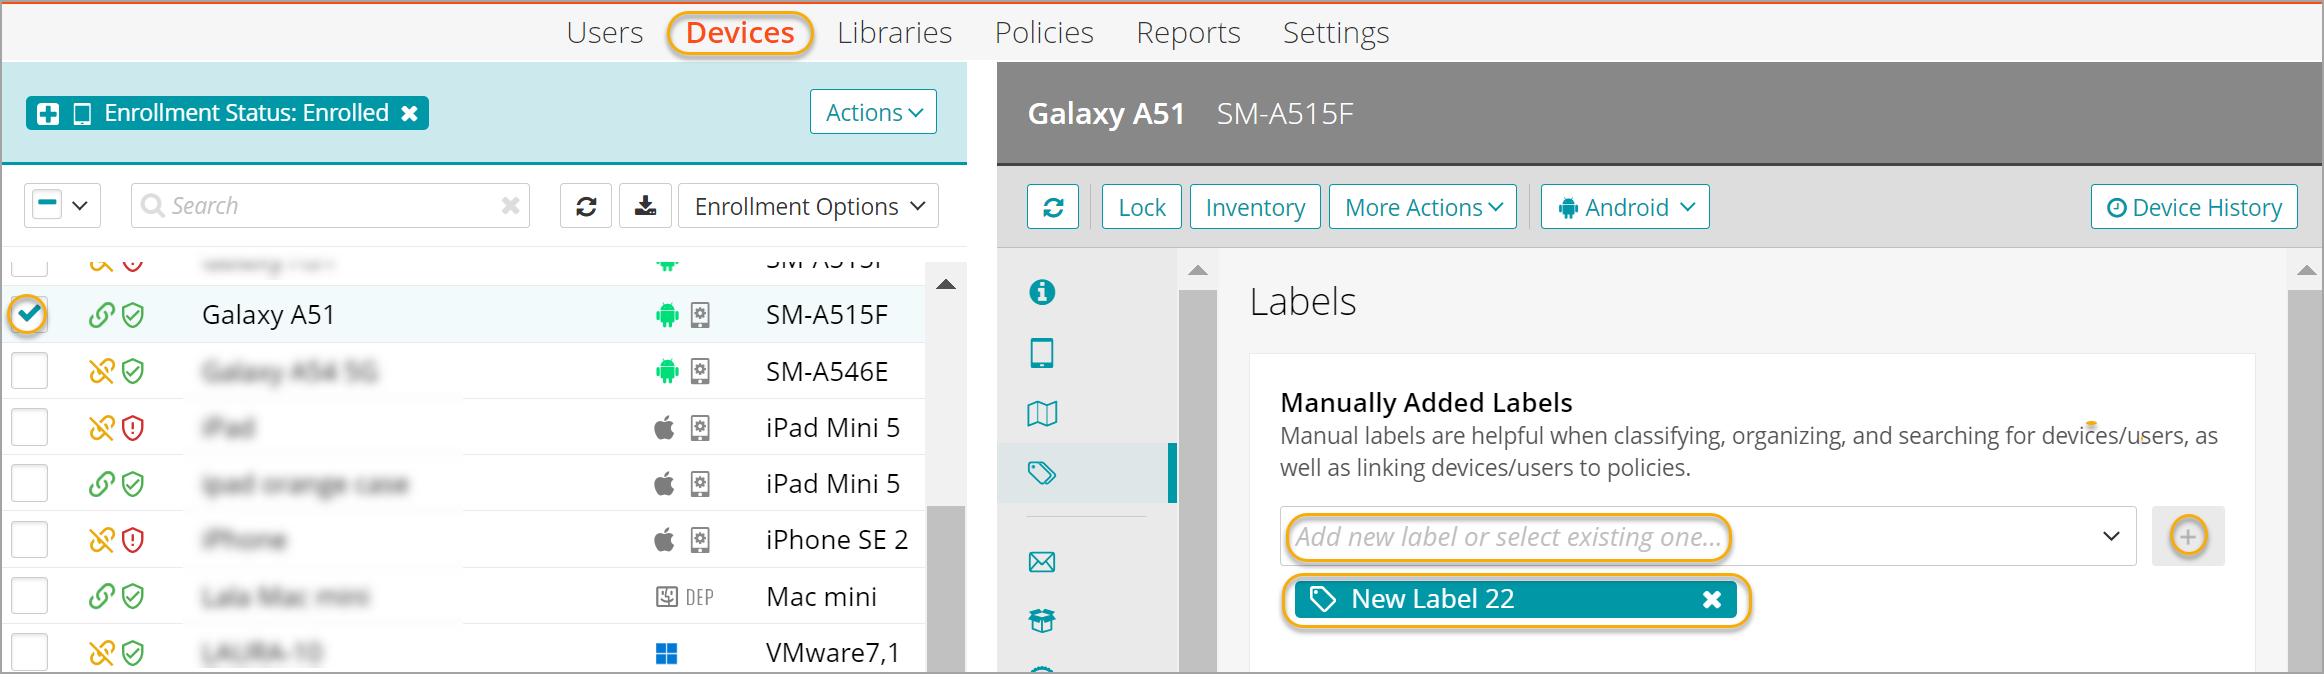
- To create a new manual label while working with devices:
- Go to the Devices tab in top navigation.
- Select a device.
- In the right panel, open the Labels tab.
A list of all labels that are currently applied to one or more selected devices.
-
Type the new label name (for example, New Label 22), then click +.
When the new label name is added, the selected devices are tagged with New Label 22. This label is automatically added to the list of labels available for selection and also to the Labels Library.
-
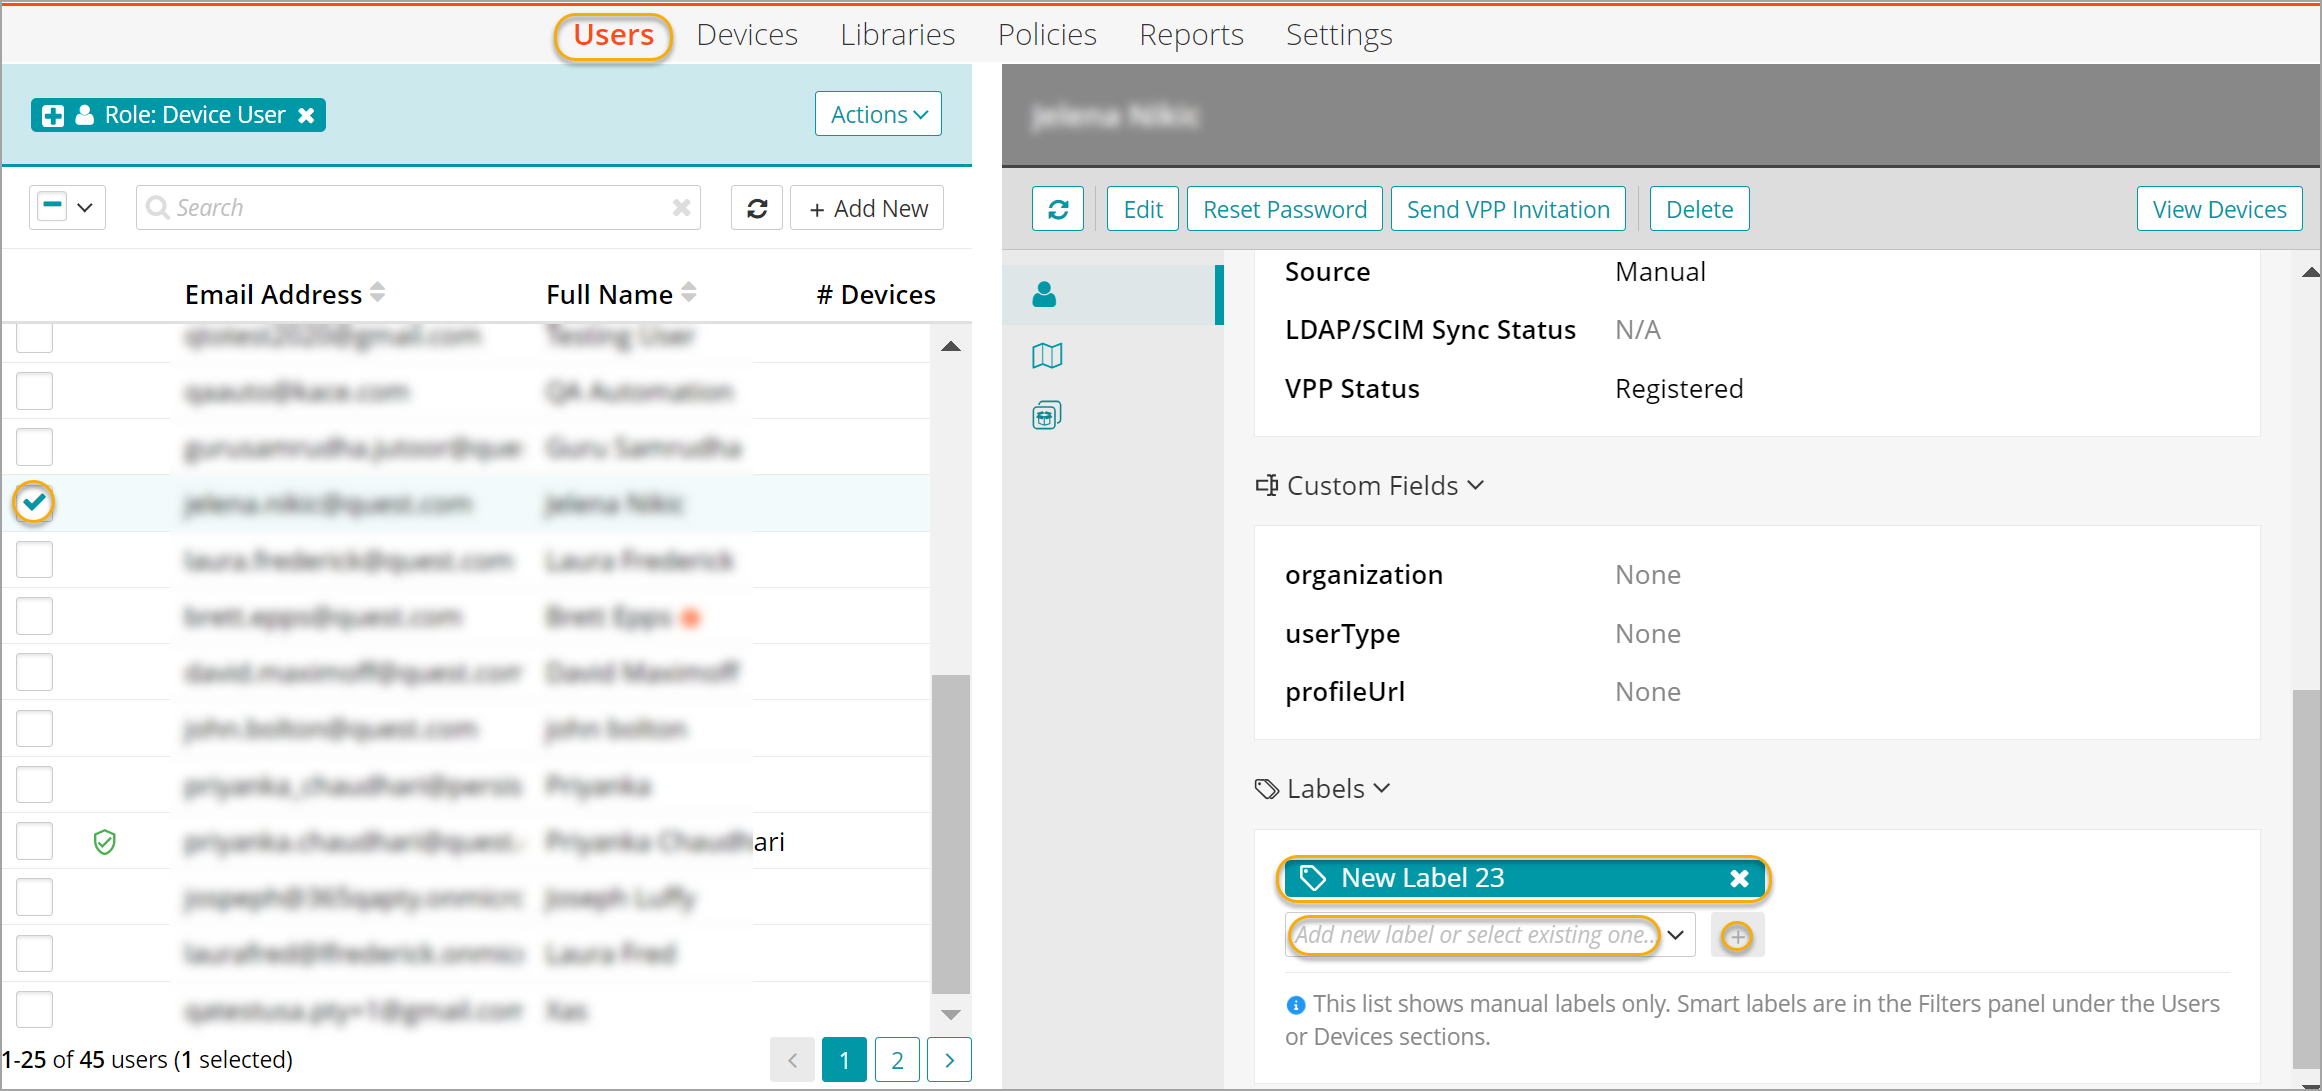
To create a new manual label while working with users:
- Go to the Users tab in top navigation.
- Select a user.
In the right panel, on the General tab, a list of all labels that are currently applied to one or more selected users appears.
-
Type the new label name (for example, New Label 23), then click +.
When the label name is added, the selected user is tagged with New Label 23. When a label is associated with a user, then it is indirectly associated with the devices assigned to that user. This label is automatically added to the list of labels available for selection and also to the Labels Library.
-
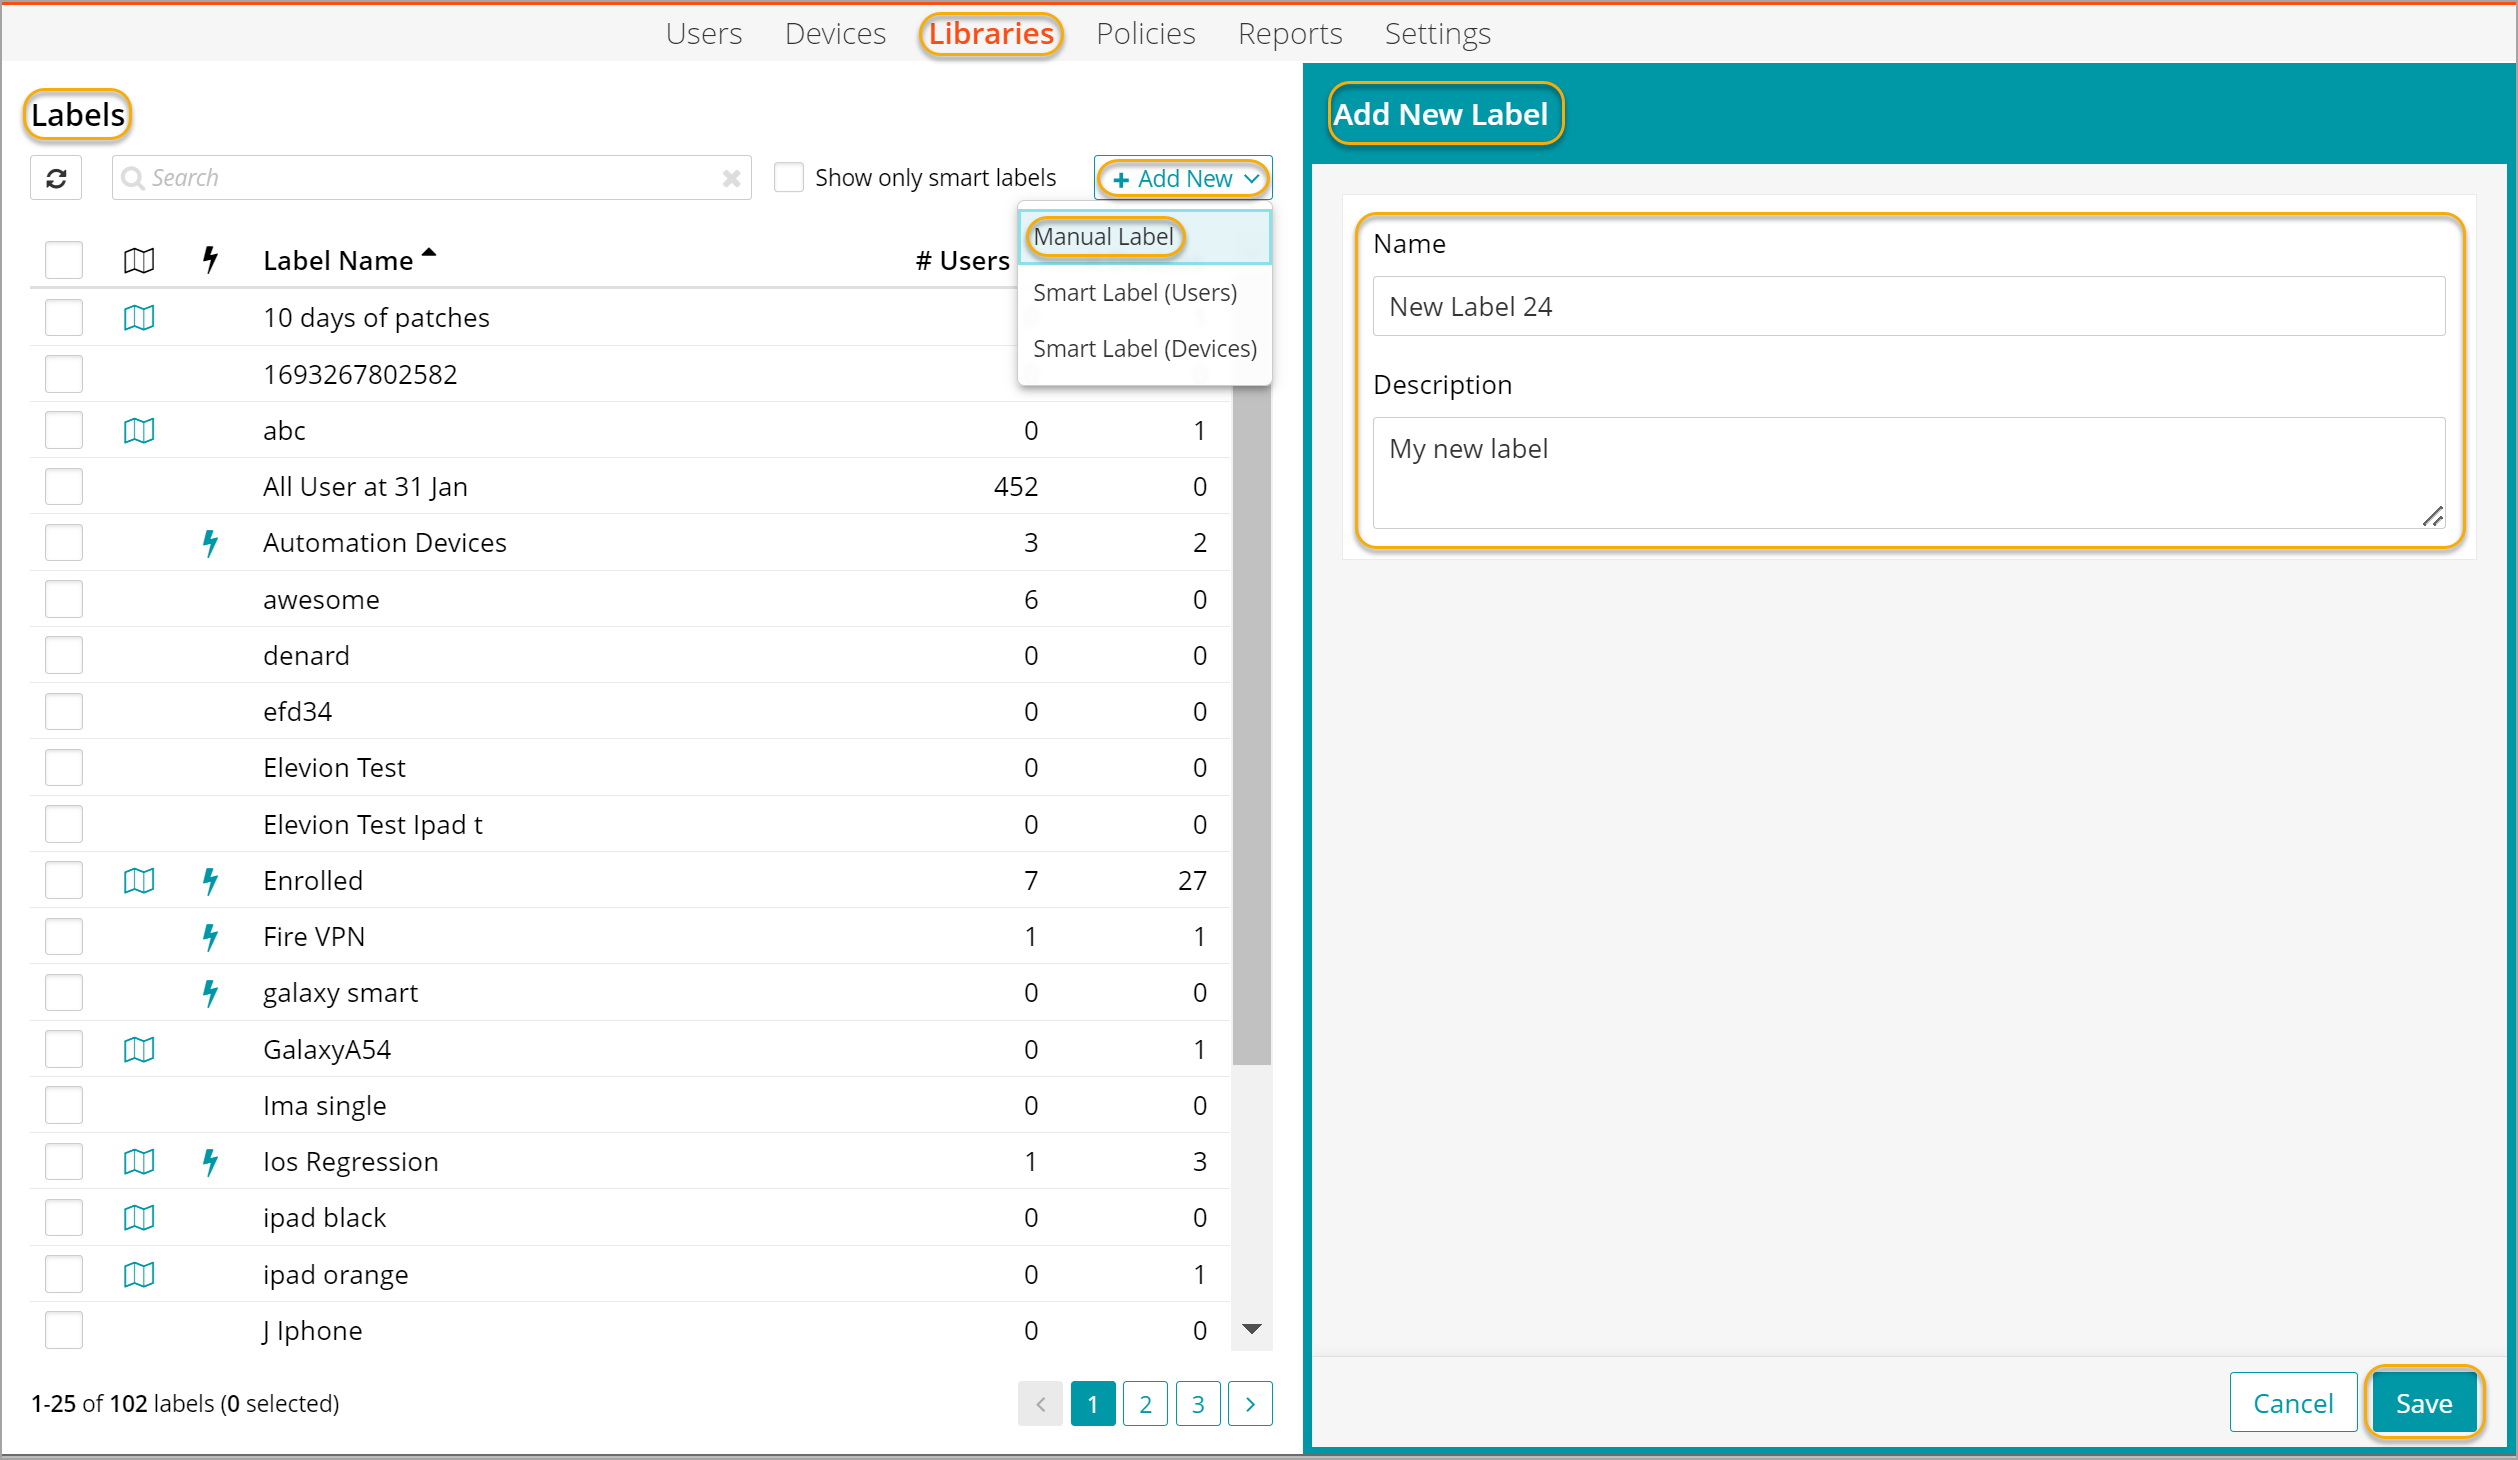
To add a new manual label to the Labels Library:
- Go to the Libraries tab in top navigation.
- In the list of Libraries that appears, click Labels.
- In the Labels Library, click Add New and choose Manual Label.
- In the Add New Label view that appears, in the Name field, type the name of the label. For example, New Label 24.
- Optionally, type a label description.
- Click Save.
The newly added label is added to the Library.
Create Smart Labels
A smart label can be created while working with a device, a user, or in the Labels Library.
To create a new smart label:
- To create a new smart label while working with users:
- Go to the or Users tab in top navigation.
- Filter the available list by the type of users you want to tag with the label.
For example, to create a smart label for the system administrators in the Wisconsin office, add the following individual filters as criteria: Status: Enrolled; Role: System Admin; and State: WI.
- To turn these criteria into a Smart Label, click Actions on the right, then choose Save as Smart Label.
- Fill in the form to the right with a label name and optional description, then click Save.
When saved, the set of multiple filters turn into a single Smart Label, as shown below. A saved smart label can be found under Filters > Labels > All Labels or in the Labels Library.
.png)
Smart label icons:
.png)
- To create a new smart label while working with devices:
- Go to the Devices tab in top navigation.
- Filter the available list by the type of users you want to tag with the label.
For example: All enrolled devices with Galaxy included in the device name and whose model is SM-A515F.
- To turn these criteria into a Smart Label, click Actions on the right, then choose Save as Smart Label.
- Fill in the form to the right with a label name and optional description, then click Save.
Filter the list of users or devices using a label
You can filter the list of users or devices to display only those associated with a specific label.
To filter the list of users or devices based using a manual or Smart label:
- Go to the Users tab or Devices tab in top navigation.
- In the filter panel on the left, open the Labels tab and use the drop-down field to find the label you are looking for.
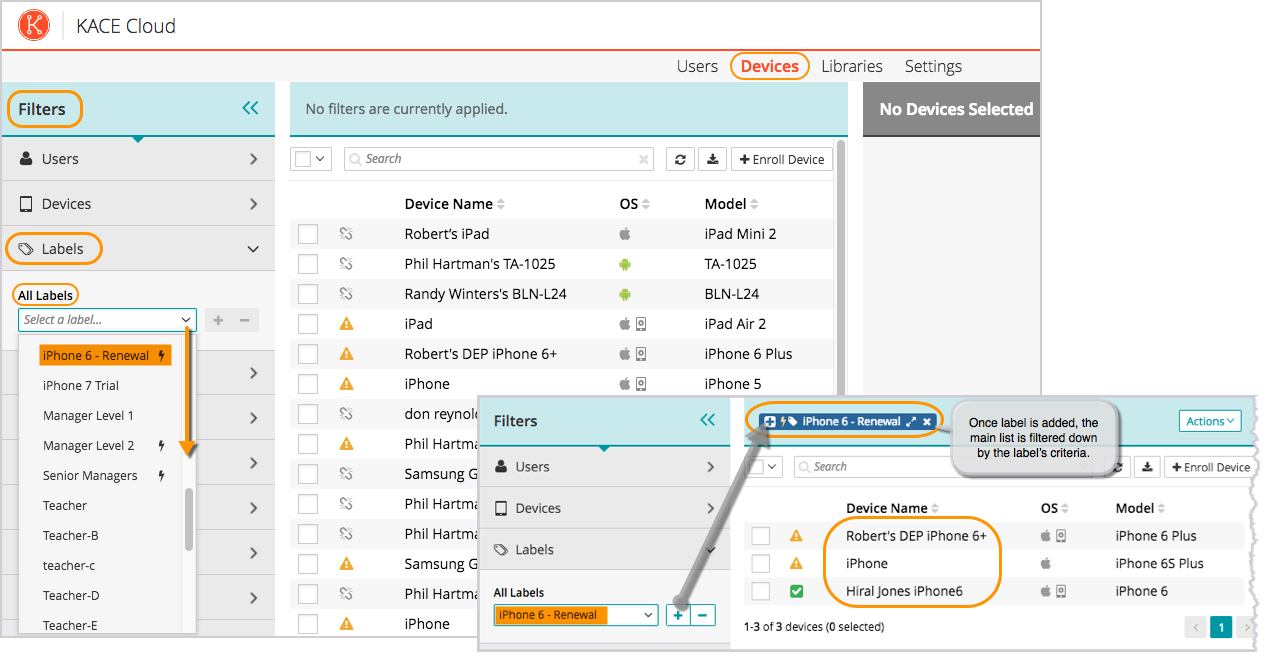
For example, let's assume that you want to locate a small group of devices labeled as eligible for upgrades when the renewal period comes around. The Smart Label is named iPhone 6 - Renewal.
- In the left pane, on the Labels tab, type iPhone 6 - Renewal, then click + to add it to the filter criteria bar.
When the label is added, the main list is quickly filtered down by the label's criteria. Smart labels are indicated with a lightning bolt icon, which indicates a function that features automation. The ability to edit, remove, and view devices or users is available or both manual and smart labels in the Labels Library.
Edit labels
- Select the Libraries tab in top navigation.
- Click the Labels Library icon.
- In the main list, choose a label.
- In the right panel, click Edit.
- Make any changes to the label name, description, or existing filters.
- Click Save.
Remove labels
- Select the Libraries tab in top navigation.
- Click the Labels Library icon.
- In the main list, choose one or more labels.
- In the right panel, click Remove then Confirm.
List users associated with specific labels
- Select the Libraries tab in top navigation.
- Click the Labels Library icon.
- In the main list, choose a label.
- In the right panel, click View Users.
A full list of users who are tagged with the selected label appears.
List devices associated with specific labels
- Select the Libraries tab in top navigation.
- Click the Labels Library icon.
- In the main list, choose a label.
- In the right panel, click View Devices.
A full list of devices that are tagged with the selected label appears.